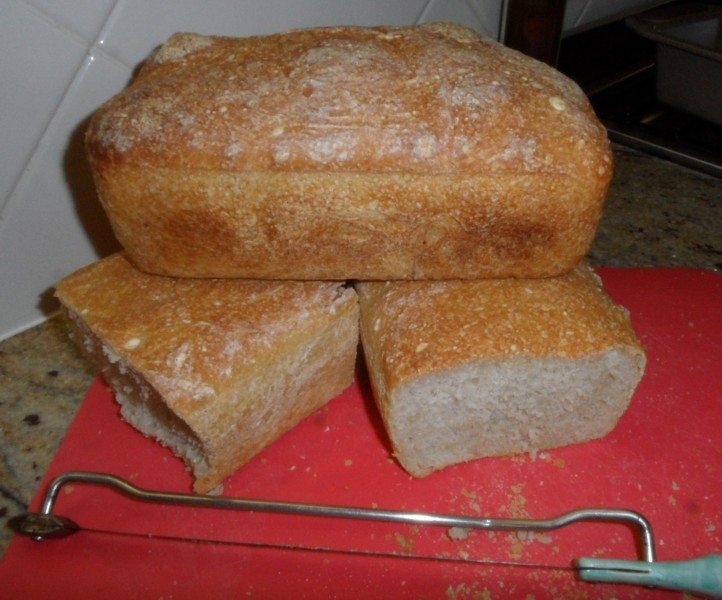
3 loaves and my grandmother’s knife
My sister-in-law started me off making sourdough bread by giving me a tub of her home-made starter and a bunch of recipes. I followed this up with spending hours on YouTube and the internet watching and reading about the “magic” of this art. There seem to be as many recipes and ways of creating this artisan bread as there are people making it. Everyone has their own method that works for them – probably due to the individual starters that have been bred by each person.
I followed the same recipe as my sister-in-law 3 times, with different flours, and still got a very runny mix. Eventually I reduced the water by 100 ml and it came out right.
I cook the bread in loaf tins because I like the shape – it fits the toaster, can be sliced easily with my grandmother’s bread knife and can be cut very thinly and toasted to substitute for biscuits.
Sourdough breadmaking has become a bit of an obsession, beware!
Considering that we are pretty much paleo our gut doesn’t cope well with all this bread so I have a constantly growing stockpile of frozen loaves. Despite this I am still working on understanding and documenting this art so when I finally put it to bed I will be able to easily make a loaf after, of course, growing up a batch of starter from my dried and frozen stockpile.
SOUR DOUGH IN A LOAF TIN
(Makes three loafs, takes 3 days so start well before you want to bake)
Day 1 (creating the strong starter)
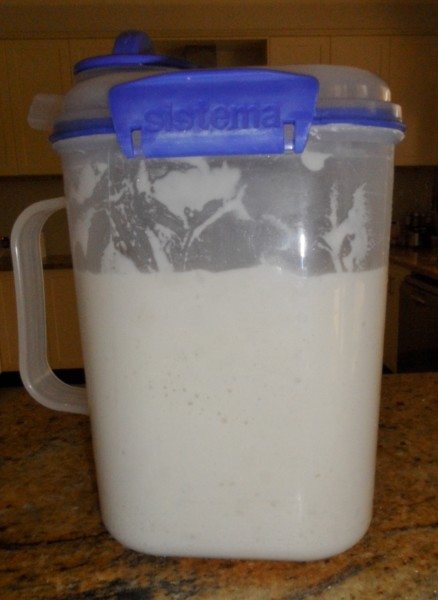
Make up this mix. It is the starter for the bread.
Ingredients
- 300g sour dough starter
- 300g bakers flour
- 300g water
- container that holds 1 litre liquid and has a lid that seals
Method
- Bring the starter master to room temperature before beginning.
- Put a container with a lid that can be sealed, on the scales and zero it, measure out each of the ingredients, zeroing between each ingredient.Stir well and leave out for 2 hours at room temperature to begin growing and bubbling, then refrigerate for at least 12 hours or overnight.
- Feed the original starter at the same time, and return it to the fridge after 2 hours.
Day 2 (Mixing and forming)
Form into rounds or loaf shapes and rest
Ingredients
- 1kg bakers flour (protein count at about 11% – add a quantity of plain or whole meal flour if the protein count is higher)
- the starter that had been made the day before, brought to room temperature
- 650g filtered warm water
- 30g non-iodised salt (check for filler as well, I use sea salt flakes or I grind up rock salt)
- 3 loaf pans
Method
- When the starter has reached room temperature and looks really active put it into the mixer fitted with a dough hook and add the warm water. Stir on low speed for 2 minutes until mixed.
- Add the flour and mix for 5 more minutes.
- Rest for 45 minutes.
- Add the salt, mix for 5 minutes. It will be smooth and coming away from the sides of the bowl. Test to see that it is very stretchy, pull a piece up and stretch it. It should be thin enough to see through.
- Scrape the sides down, gather it together in a round shape, and set aside in the bowl, at room temperature, covered for 3 to 4 hours. I use a plastic shopping bag.
- Check that the dough has grown 1½ times and when pulled away from the sides there are obvious bubbles.
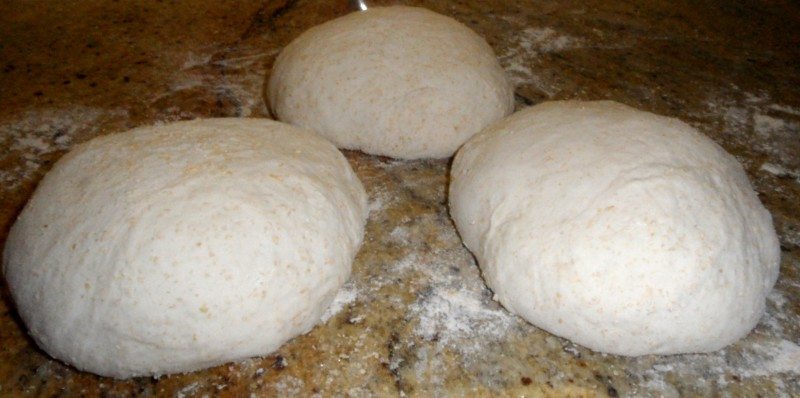
- Put the dough on to a floured bench, roll into a long shape and divide into 3 even portions – I use the scales to make them even size.
- Grease 3 loaf tins with spray olive oil and rub it around.
Forming loaves
When forming the dough pieces into loaf shapes it is important to get tension in the “skin”. Do this by stretching the dough out lengthwise then folding in each end, in thirds. On the side where the three layers now meet push down hard with your knuckles to squash them together. This will be the seam and hopefully it ends up on the base of the loaf. Next with thumbs on the inside and fingers on the outside on the opposite side, roll the dough towards the seam, stretching and rolling until the seam is met. Coat the loaves well with flour and roll each loaf into a geased tin, seam side down if baking in the tin or seam side up if using the tin for proving and making a more “artisan” looking loaf.
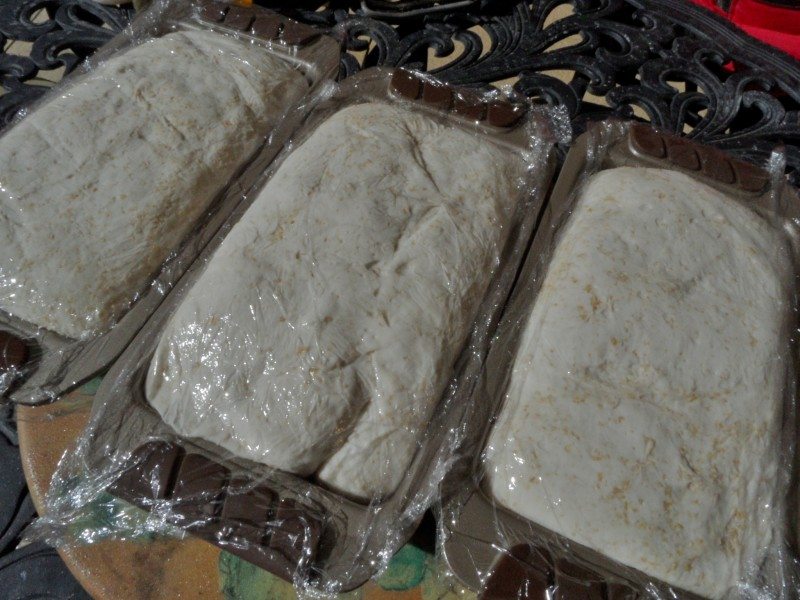
For this recipe cover the pans with plastic wrap and refrigerate overnight.
Day 3 (baking in a bread tin)
After resting in the fridge over night, bring back to room temperature. I used some wholemeal flour in these loaves.
- spray bottle containing water
- pizza stone
- Very thin blade knife eg box cutter
Method
- Bring dough to room temperature, this takes a couple of hours – in Winter I put it on the table in the sun or on top of the heated, but turned off sandwich press or under the air conditioning vent. Let it rise until double the original size.
- When the dough has reached room temperature turn the oven to maximum heat and put in a pizza stone to heat up.
- When the oven has reached temperature cut slices diagonally (or down the centre) into the top of each loaf (use a thin bladed box cutter to slice not drag), spray the top of each loaf and the oven with water to slow the formation of the crust.
- Bake for 10 minutes at the highest temperature then lower the temperature to 210°C and continue baking for another 20 minutes. Check that the loaves are cooked by checking the internal temperature – they should be at least 96°C.
- Leave in the pans to cool slightly, this keeps the base and sides fairly soft and good for sandwiches and then remove from pans and place on a wire to finish cooling.
SOURDOUGH FRUIT LOAF
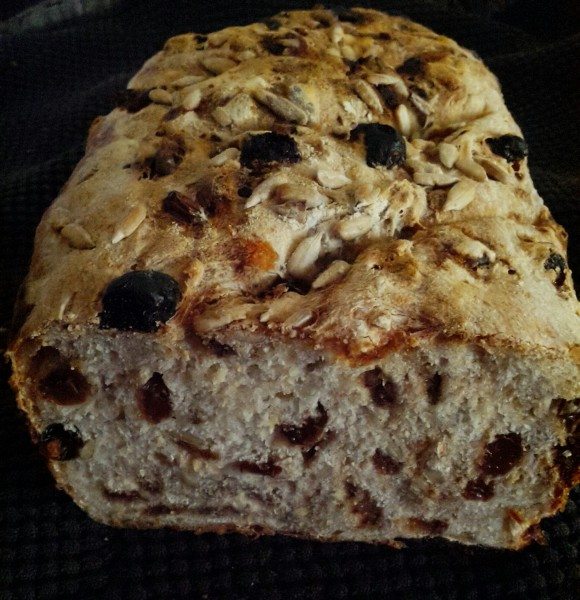
Add fruit, seeds, nuts and spices to sourdough mix
This is absolutely so much better than the store bought raisin bread. It has taste, texture and flavour, really worth the effort. Make up the recipe as above and use 1/3 of the mix.
Additional Ingredients
To make 1 fruit loaf:
- total of 1½ cups of sultanas, chopped dates, pumpkin seeds, sunflower seeds, chopped walnuts
- 1 tbs cinnamon
- ½ cup coconut sugar
Method
- Mix all of the nuts, seeds and fruit with the cinnamon and sugar.
- Make the recipe up to forming the loaves. Take one of the pieces of dough and stretch out one end, spread some of the fruit mix on top and fold over, stretch the other end and repeat. Do the same with the other 2 sides kneading all of the mix into the dough.
- Shape it into a loaf shape and allow to rest for 1/2 hour before placing in the tin. Slash diagonals in the top, cover with plastic wrap and put in the fridge overnight.
- Continue with the above instructions.
CHEATS QUICK SOURDOUGH (add a bit of yeast)
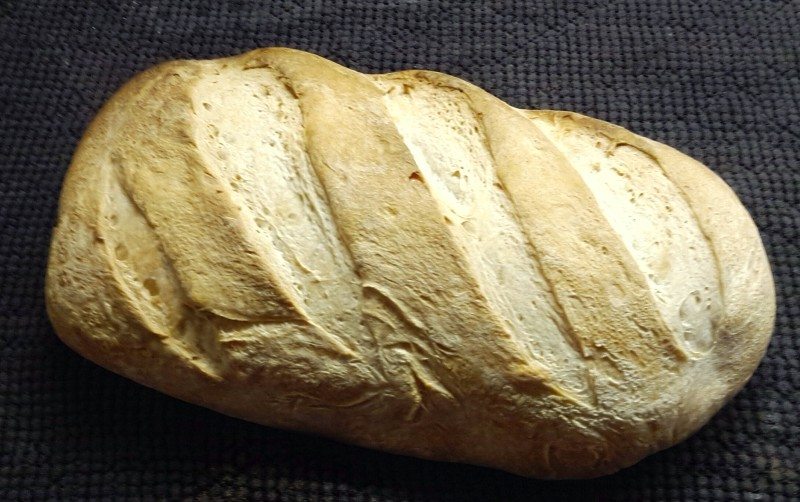
Freeform sourdough proven in a greased loaf tin – no sticking
This makes one good sized loaf but with the addition of a bit of yeast to help with the rise it means you can bake a loaf from start to finish in one day and it still tastes like sourdough.
Ingredients
- 1 cup sourdough starter (active, fed recently and allowed to grow for a few hours)
- ½ tsp dry yeast
- 300 ml warm filtered water
- 1 tbs olive oil
- 3 ½ cups baker’s flour
- 10 g salt flakes
Method
- Put the dough hook on the mixer and add yeast and all wet ingredients (starter, water, oil) and mix well.
- Add salt and flour and continue mixing until all flour is taken up and the mix is coming away from the sides of the bowl. Adjust water or flour until this is right, then continue kneading for 10 minutes. If it is sticking to the hook give it a burst on high speed.
- Scrape out the bowl, form the mix into a ball and place back into the bowl, cover it (a plastic shopping bag works for me), and leave in a warm spot to double in volume, approximately 3 to 4 hours.
- Gather up the dough and put on a very lightly floured bench and shape the loaf following the method in the first recipe above (forming loaves).
- I now prove my dough in my oiled bread pans, it works and the dough doesn’t stick. I had a few disasters trying to get the dough out of my floured, linen lined baskets so I won’t be trying it again.
- Put the well floured loaf into the pan seam side down, leave covered to rise for another 2 hours.
Baking free form loaves
- spray bottle containing water
- pizza stone
- Very thin blade knife eg box cutter
- Very hot oven
Method
- Bring dough to room temperature, this takes a couple of hours – in Winter I put it on the table in the sun or on top of the heated, but turned off sandwich press or under the air conditioning vent. Let it rise until double the original size.
- Put the pizza stone in the oven and heat to maximum (top and bottom elements seem to be the fastest way to do this).
- Check that the dough is going to come away from the pan by rolling it gently each direction in the pan, this loosens it without reducing the lift.
- Sprinkle semolina on the stone then gently roll the loaf onto the middle of the stone so the seam ends up on the bottom. Cut slits in the top and spray the dough and the inside of the oven with water to bring up the humidity and slow down the formation of the crust.
- Rotate a couple of times if not using the fan forced setting. My loaves seem to be better with just the top and bottom elements.
- Bake for 10 minutes at the highest temperature then lower the temperature to 210°C and continue baking for another 20 minutes. Check that the loaves are cooked by checking the internal temperature – they should be at least 96°C or do it the old fashioned way by tapping it, it should sound hollow.
- Immediately put on to a rack to cool or the bottom will loose its crispness.