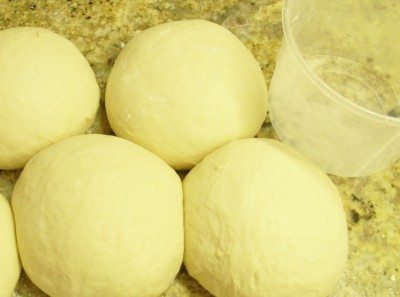
Pizza dough rolled after initial mixing
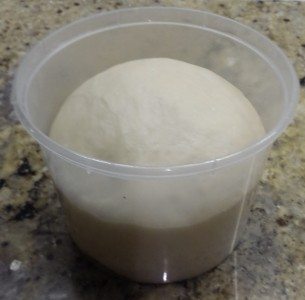
Pizza dough in container, ready for the fridge or left out if needed the same day.
PIZZA DOUGH
We bought a wood fired pizza oven and then discovered that there is a lot more to pizza than we had ever imagined. The main thing that I learned is that there is an art to the dough and that all doughs are not created equal. To this end we have spent the last couple of months (since we bought the oven) making doughs to different recipes, with different resting times and raising times and proportions of ingredients.
Here are a few recipes that seem to work for our family:
Crisp thin dough
This is based on a dough I saw being done by Heston Blumenthal (search You Tube). Below I have distilled this down to the ingredients, and added a method and other bits that I have picked up through reading and experimentation.This needs to be started at least a day before needing it as it needs to complete rising slowly in the fridge.
Ingredients
(Don’t double the mix unless you have a huge mixer.)
- 1 kg flour – I use bakers flour, 12% protein (I can buy it in 1 kg bags from Dijon – makes it very easy) – keep 1 cup aside to add after the first resting
- 2 tsp salt
- 4 tsp molasses
- 14 g yeast (I use a small plastic medicine cup to hold the yeast and measure on a mini scale)
- 650 ml of lukewarm filtered water (weigh the water – 650g)
Method
- Add 3/4 of the flour, salt, and yeast to the Kitchen Aid mixing bowl, and mix with the beater attachment to ensure all ingredients are well mixed.
- Change to the dough hook.
- Mix the molasses into the water and tip into the flour mix. Knead slowly for 1 to 2 minutes until all ingredients are quite wet, like batter, then rest covered for 20 minutes.
- After resting, mix slowly for 5 minutes to work the gluten. If the mix is too dry the gluten in the flour doesn’t get worked, the dough just goes round still attached to the dough hook.
- After 5 minutes begin adding the flour that was kept aside, to take it to 8 minutes, stopping adding the flour when the dough is still wet but has all come away from the edges. Increase the speed to about 1/3 and knead for another 2 minutes,
- Rest covered for another 20 minutes in the bowl.
- Roll out onto a floured board or granite bench top into a long loaf. Cut the dough into lumps of about 185 g (makes 8 balls), or 7 bases at 220 g, then using floured hands roll each piece into a ball, tucking the excess into the bottom while forming.
- If not needed straight away put a drop of oil into some round “Chinese Food Containers” and smear it around. Drop a ball of dough into each, close the lid, and put straight into the fridge so it rises slowly. If made a day or two before needed it seems to be better, just take the dough out of the fridge a couple of hours before it is going to be needed / when you start getting the pizza oven ready. If frozen you need to let it defrost slowly – up to 12 hours – don’t use the microwave.
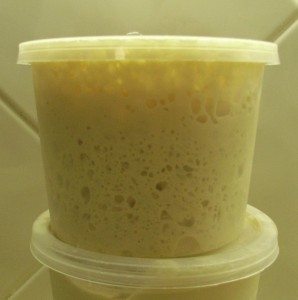
Pizza dough after rising – ready for squashing down and spreading out.
Kefir Pizza Dough
This dough is more like a cross between the pizza hut base and a sour dough bread. Because it is relying on the yeast in the kefir, which of course will vary depending on the batch, needs a fair amount of time to raise. If using same day then I like to give it at least 5 hours. This dough needs lots of raising time at room temperature, whereas the previous one needs to be kept in the fridge to slow down the rise.
Ingredients
- 2 cups bakers flour
- 1 cup kefir
- 1 tsp salt
- 2 tsp molasses
Method
- I use the method above – keeping aside some of the flour, allowing a resting time and keeping to the same kneading time.
- It is easier to make the mix drier if it is too wet than it is to add extra liquid so keep the flour aside to add after working the dough, adding only enough to make the dough come away from the sides.
Quick and Easy
This pizza dough has changed the way we entertain using the pizza oven. The dough takes about 10 minutes to make, and needs resting for just 10 minutes. It can be made as needed – it only has a few ingredients and they are ones that are usually in my house – so we can easily deal with the spur of the moment pizza meals. Our pizza oven will get far more use.
Ingredients
- 4 cups plain flour
- 8 tsp baking powder,
- 3 tsp salt
- 2 cups Greek yoghurt
Method
- Put the salt, baking powder and 2/3 of the flour into the mixer and mix with the paddle, change to a dough hook, add the yoghurt and mix until the flour comes away from the edges, adding more flour if necessary. Continue mixing for 10 minutes.
- Remove the dough to a floured bench.
- Form into a sausage shape and cut into 7 pieces (about 220g each), then knead each lightly and form into a ball (as described above).
- Place each one into an oiled plastic container and leave for 10 minutes before using.
- Follow the following instructions on making the base, paint with olive oil and add the toppings.
Quick Gluten free Pizza Dough – quick
I had to make a gluten free pizza for a relative so I adapted this one from the Leggos website. I didn’t taste it but was assured that it was good, and the person I made it for took the remaining dough home to try making her own pizza.
Ingredients
- 1½ cups gluten free SR flour
- ½ tsp salt
- 1 egg
- 2 tbs olive oil
- ½ cup lactose free milk
Method
- Put the oil, egg and milk into a dish and mix lightly.
- Put the salt and 1 cup of the flour into the bowl of the mixer with a dough hook on. Mix then slowly add the liquid mix and mix for a while.
- Gradually add more flour until the dough comes away from the sides.
- Continue kneading for about 5 minutes, then remove dough onto a floured bench and knead lightly into a ball shape.
Making the pizza base
Now we have a fantastic dough, all that needs to be done is make it into bases – this is an art which I haven’t yet mastered, but some people can do beautiful things with my dough.
- On a floured board spread the dough using the side of your hand and rotating the dough as you go. When it is starting to spread lift it up and rotate, holding by the outer edges, let it fall into shape.
- When the desired shape and thickness is achieved, sprinkle some semolina on the upturned pizza tray (upside down!!) and place the dough on it. Don’t work it any more.
- Work fairly quickly adding the passata and topping and into the oven. If it gets soggy or worked at this point it becomes hard to remove and the dough suffers.
PASSATA
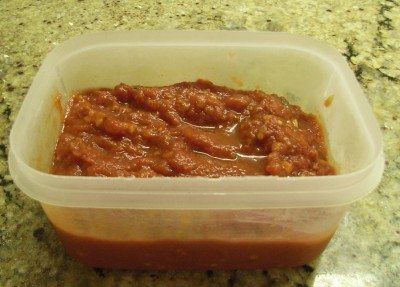
Home made passata – can be frozen
Easy to make but still pretty much a matter of taste so I don’t really have measurements. I will update as I make it more often. All ingredients and quantities here should be taken as estimates only.
This freezes quite well so make enough for a few pizza days or use the remainder in a pasta sauce or paella, which is a great way to use up the left over pizza toppings.
Ingredients
- 2 tins crushed tomatoes
- tomato paste / dried tomatoes / dehydrated tomato sheets
- 1/2 cup water
- 1 tbs white wine vinegar
- bunch oregano
- 4 cloves garlic
- 1/2 finely chopped onion
- 1 tbs sugar
- black pepper to taste
- Vegetta to taste
Method
- Cook garlic and onion in a little oil until they have lost their “rawness” but not browned.
- Add tomatoes, tomato paste and water and simmer until flavours have blended and mixture thickened.
- Add herbs and seasonings and check for flavour and taste. It should be pretty tasty but not too salty.
- Blend with a stick mixer and continue to thicken if necessary.
PIZZA TOPPINGS
It has taken a while but I have finally got this pizza day thing sorted. It is all about the dough and generally it is best if it is made the day before. My one batch that starts with 1 kg of flour makes 7 bases at about 220g each. I allow 1 pizza per person.
It is awful to run out so erring on the safe side is normal with me, besides that, it is ok to freeze leftovers, just don’t try to defrost in the microwave. Allow about 4 hours to defrost if it has risen before freezing and longer if it went into the freezer as soon as it was made.
It takes a fair while to make a batch with 2 lots of 20 minutes resting cycles so allow plenty of prep time the day before it is needed.
I have a bunch of oval plastic containers with lids to put the toppings in. They stack neatly in the fridge and don’t take up too much space on the preparation bench on the day, and the lids help manage the flies on bad fly days.
The toppings listed are a reminder of the possibilities, are not exhaustive and definitely not all necessary.
Ingredients
- sliced onions
- dried tomatoes
- chopped fresh tomatoes
- anchovies
- minced garlic
- olive oil
- chopped capsicum
- sliced mushrooms
- chopped ham
- marinated chicken (mustard and garlic for 24 hours then pre cooked in a pan in the pizza oven)
- raw prawns peeled, cut into 3 and marinated in garlic
- chopped salmon pieces
- snow peas topped and tailed
- basil and oregano leaves
- ham or bacon
- pineapple pieces
- salami – easier to buy pre-sliced from the deli
- pepperoni
- broccoli florets
- Cheese – grate mozzarella, tasty and parmesan through the food processor
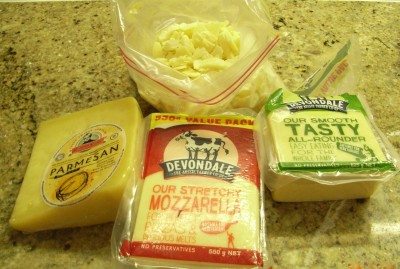
Mozzarella, parmesan and tasty cheeses
Any good pizza shop will usually only include 3 toppings on a pizza. Don’t assume that when guests are making their own and experimenting with flavours that any sort of restraint will be shown.
Our tradition is a run through of how to make a pizza then each person has a go.
Try to avoid having a queue waiting to go into the oven. The longer they sit the poorer the result.
SLOW DOWN
MAKE – COOK – WAIT A BIT BEFORE CUTTING – CUT – EAT AND SHARE – START THE NEXT ONE.